
kasia’s pierogi cooking instructions
Kasias Pierogi are a beloved dish with a rich history‚ offering a delightful blend of traditional Polish flavors and modern convenience․ Made with natural ingredients‚ these pre-cooked pierogi provide a hassle-free way to enjoy authentic taste․ Available in various fillings‚ they cater to diverse preferences‚ ensuring a satisfying experience for all․ The brand’s legacy since 1982 guarantees quality‚ making Kasias Pierogi a perfect choice for home cooking or special occasions․ Simple to prepare‚ they allow you to savor homemade goodness without the extra effort․ Whether boiled‚ pan-fried‚ or baked‚ Kasias Pierogi deliver a hearty‚ flavorful meal that brings people together․ Embrace the tradition and convenience of Kasias Pierogi for a truly memorable dining experience․
What Are Kasias Pierogi?
Kasias Pierogi are traditional Polish dumplings filled with savory or sweet ingredients‚ offering a taste of authentic Eastern European cuisine․ Established in 1982‚ Kasias has perfected the art of creating pre-cooked pierogi with natural ingredients․ Available in various fillings‚ they cater to diverse tastes‚ from classic potato and cheese to modern alternatives․ These versatile dumplings are designed for easy preparation‚ allowing home cooks to enjoy a hearty‚ flavorful meal with minimal effort․ Perfect for boiling‚ pan-frying‚ or baking‚ Kasias Pierogi bring comfort and tradition to every table‚ ensuring a satisfying and memorable dining experience for all․ Discover the rich history and convenience of Kasias Pierogi‚ crafted with care to deliver homemade goodness without the hassle․ Their long-standing reputation guarantees quality and authenticity‚ making them a beloved choice for families and food enthusiasts alike․ Whether you’re a traditionalist or an adventurous eater‚ Kasias Pierogi offers something for everyone‚ blending heritage with modern convenience seamlessly․
Origins and Tradition
Pierogi are a cherished traditional dish in Polish cuisine‚ symbolizing warmth and togetherness․ Originating in Eastern Europe‚ they are typically filled with ingredients like potatoes‚ cheese‚ meats‚ or fruits‚ reflecting the region’s rich culinary heritage․ Kasias‚ since 1982‚ has embraced this tradition‚ crafting authentic pierogi that honor centuries-old recipes․ By using time-honored methods and quality ingredients‚ Kasias ensures that each pierogi carries the genuine taste of Polish culture‚ making it easy for modern cooks to enjoy a piece of tradition in every bite․
Why Choose Kasias Pierogi?
Kasias Pierogi stand out for their commitment to quality and authenticity․ Made with all-natural ingredients‚ these pre-cooked pierogi offer a convenient way to enjoy traditional Polish flavors․ With a variety of fillings and easy cooking methods‚ Kasias caters to diverse tastes and dietary preferences․ Their legacy since 1982 ensures a product that is both flavorful and reliable‚ making them a top choice for home cooks seeking a delicious‚ hassle-free meal that feels homemade․

Ingredients and Tools Needed
Essential tools include a large pot for boiling‚ a slotted spoon‚ and a skillet for frying․ Pre-cooked pierogi simplify preparation‚ requiring only water‚ oil‚ or butter for cooking․
Essential Ingredients for Pierogi Dough
The dough for Kasias Pierogi typically requires all-purpose flour‚ warm water‚ and a touch of salt․ Adding an egg enhances elasticity and richness․ Some recipes include a tablespoon of oil for moisture․ The simplicity of these ingredients ensures a tender yet durable texture‚ perfect for holding flavorful fillings․ Using warm water helps activate the gluten‚ while avoiding overmixing keeps the dough soft and pliable․ This traditional blend creates the foundation for a delicious‚ authentic pierogi experience․
Filling Options: Classic and Modern Varieties
Kasias Pierogi offers a variety of fillings to suit every taste․ Classic options include potato and cheese‚ a timeless combination rich in flavor․ Modern twists introduce ingredients like meat‚ fresh fruits‚ and vegetarian choices‚ catering to diverse dietary needs․ Each filling is crafted to complement the dough‚ ensuring a balanced taste experience; Whether traditional or innovative‚ these fillings are designed to delight‚ offering something for everyone to enjoy․ Quality and freshness shine through in every bite․
Tools for Pierogi Preparation
Preparing Kasias Pierogi requires essential tools like a large mixing bowl for dough preparation‚ a rolling pin to flatten the dough evenly‚ and a round cookie cutter or pasta cutter to create uniform pierogi shapes․ A slotted spoon is handy for boiling‚ while a skillet or frying pan is ideal for pan-frying․ Additionally‚ measuring cups and a clean workspace ensure precise ingredient proportions and efficient assembly․ These tools simplify the process‚ making pierogi preparation both enjoyable and efficient․

Preparing the Pierogi Dough
Combine flour‚ warm water‚ egg‚ and salt in a mixing bowl․ Mix until a dough forms‚ then knead until smooth and elastic․ Let rest for 30 minutes to enhance pliability‚ ensuring easy rolling and shaping for pierogi creation․
Step-by-Step Dough Preparation
- In a large bowl‚ combine 2 cups of flour‚ 1 egg‚ and a pinch of salt․
- Gradually add 1/2 cup of warm water‚ mixing until a dough forms․
- Knead the dough on a floured surface for 5-7 minutes until smooth and elastic․
- Cover with plastic wrap and let rest for 30 minutes․
- Divide the dough into smaller pieces and roll out thinly before cutting circles for pierogi․
Tips for Achieving the Perfect Dough Consistency
To achieve the perfect pierogi dough‚ use all-purpose flour for elasticity and tenderness․ Gradually add warm water while mixing to avoid a too-wet texture․ If dough feels dry‚ add a little more water; if sticky‚ add flour․ Resting the dough for 30 minutes ensures gluten relaxation‚ making it easier to roll out․ Avoid overworking the dough to maintain its delicate consistency․ A smooth‚ elastic texture is ideal for wrapping fillings without tearing․
Preparing Pierogi Fillings
Creating pierogi fillings requires balance and freshness․ Classic options like potato and cheese blend simplicity with flavor‚ while modern twists offer variety․ Use high-quality‚ fresh ingredients for the best taste‚ ensuring fillings are well-seasoned but not overly complicated․ This step is where tradition meets creativity‚ allowing you to craft fillings that suit any preference or dietary need․ Freshness and flavor harmony are key to delicious pierogi․
Classic Potato and Cheese Filling
The classic potato and cheese filling is a timeless choice‚ combining mashed potatoes with farmer’s cheese for a creamy‚ hearty flavor․ To prepare‚ boil potatoes until tender‚ then mash and mix with softened cheese‚ adding salt and pepper to taste․ Some recipes include fried onions or chives for extra depth․ This filling is a staple in traditional pierogi‚ offering a comforting and familiar taste that pairs perfectly with butter or sour cream․
Alternative Fillings: Meat‚ Fruit‚ and Vegetarian Options
For a twist on tradition‚ explore meat‚ fruit‚ and vegetarian fillings․ Ground meat seasoned with spices offers a savory option‚ while fruit fillings like strawberry or blueberry create a sweet surprise․ Vegetarian choices‚ such as sautéed mushrooms or caramelized onions‚ add earthy flavors․ These diverse options cater to various tastes‚ making pierogi versatile for both main dishes and desserts․ Experiment with these fillings to create a unique culinary experience tailored to your preferences․
Assembling the Pierogi
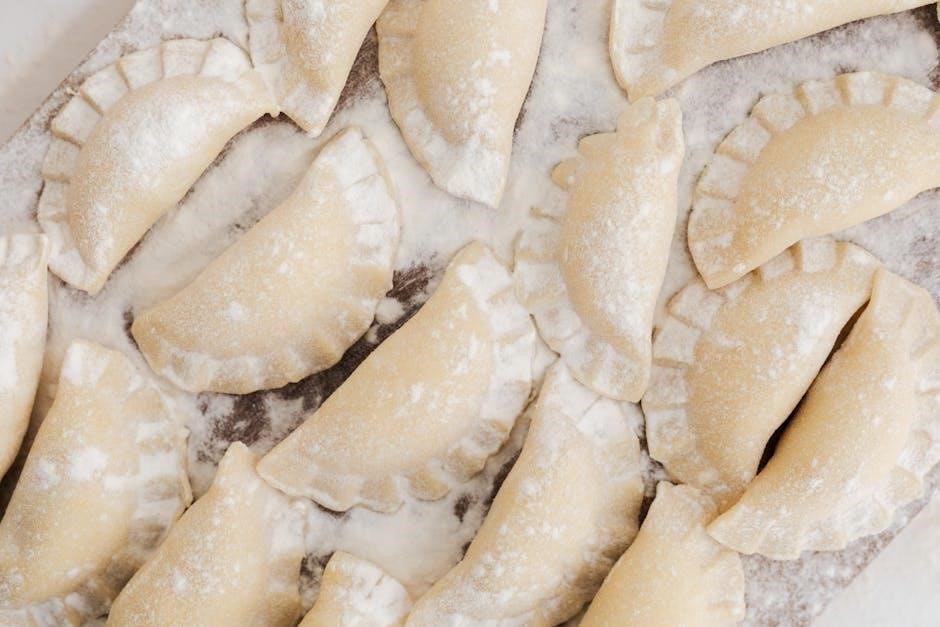
To assemble pierogi‚ place a small portion of filling in the center of each dough circle․ Fold the dough over to form a half-circle‚ pressing edges tightly to seal․ Use a fork to crimp the edges for a secure closure․ Ensure no filling escapes during sealing for perfect cooking results․
How to Form Pierogi Shapes
Roll out the pierogi dough thinly on a floured surface․ Use a round cutter or the rim of a glass to cut out circles․ Place a tablespoon of filling in the center of each dough circle․ Fold the dough over the filling to form a half-circle or other desired shape․ Press edges firmly to seal‚ ensuring no gaps for filling to escape during cooking․ Adjust dough thickness as needed for uniform shapes․
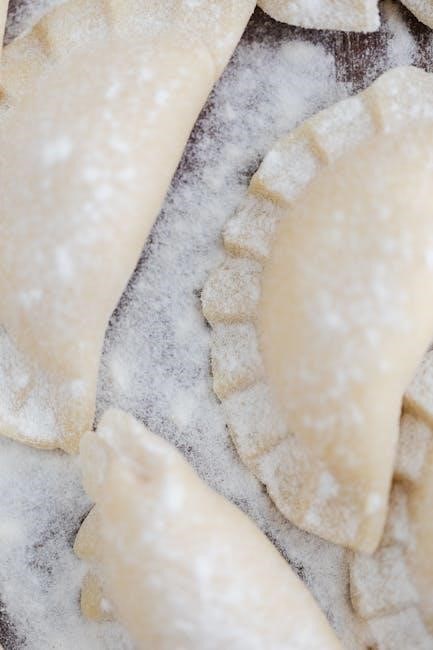
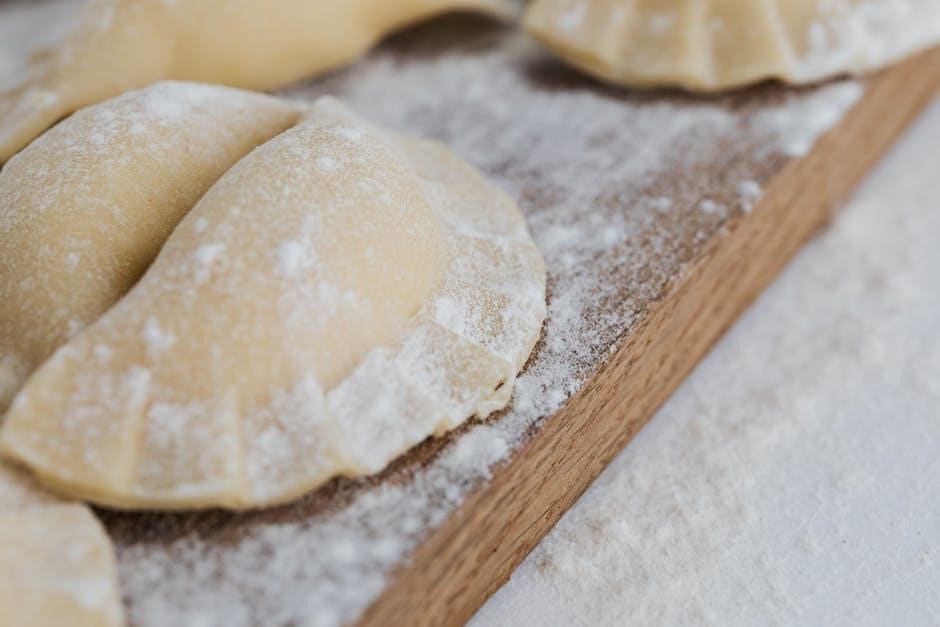
Sealing Techniques for Perfect Pierogi
To ensure pierogi are perfectly sealed‚ press edges firmly with fingers or a fork to create a tight bond․ Use a gentle yet firm touch to avoid tearing the dough․ For added security‚ crimp edges with a fork‚ creating small indentations․ This prevents filling from escaping during cooking․ Proper sealing is crucial for maintaining the integrity of the pierogi while boiling or pan-frying‚ ensuring a delicious and satisfying dish every time․

Cooking Methods for Kasias Pierogi
Kasias Pierogi can be boiled‚ pan-fried‚ baked‚ or air-fried for a crispy texture․ Each method offers a unique flavor and convenience for any meal preparation․
Boiling: Traditional Pierogi Cooking
Boiling is the classic method for cooking Kasias Pierogi․ Bring a large pot of salted water to a boil․ Gently add pierogi‚ ensuring they don’t stick together․ Cook for 2-3 minutes or until they float to the surface․ Once they rise‚ allow an extra minute for even cooking․ Remove with a slotted spoon‚ drain excess water‚ and serve with butter‚ onions‚ or sour cream for an authentic experience․ This method preserves their tender texture and flavor․
Pan-Frying for Crispy Pierogi
Pan-frying adds a golden‚ crispy texture to Kasias Pierogi․ Heat a skillet with 3 tablespoons of oil over medium heat․ Add pierogi in a single layer‚ ensuring space between each․ Cook on low heat for 6 minutes on one side‚ then flip and cook for 2 minutes on the other until golden brown․ This method enhances their flavor and texture‚ creating a satisfying crunch․ Serve hot with melted butter‚ onions‚ or sour cream for a delicious twist․
Baking: A Healthier Alternative
Baking offers a healthier way to enjoy Kasias Pierogi with minimal oil․ Preheat your oven to 400°F (200°C)․ Place pierogi on a baking sheet lined with parchment paper‚ ensuring they’re evenly spaced․ Bake for 18-20 minutes‚ flipping halfway‚ until heated through and lightly browned․ This method preserves the pierogi’s natural flavors while offering a crispy exterior․ Serve with your favorite toppings‚ such as sour cream or sautéed onions‚ for a delicious and guilt-free meal․
Air Frying: Modern Convenience
Air frying is a quick and modern way to cook Kasias Pierogi with minimal oil․ Preheat the air fryer to 400°F (200°C)․ Cook full-size pierogi for 12-14 minutes and mini pierogi for 10-12 minutes‚ shaking the basket halfway․ This method yields a crispy exterior while keeping the inside tender․ Perfect for a fast‚ healthy meal‚ air-fried pierogi are ready to serve with your favorite toppings‚ such as sour cream or caramelized onions․

Serving Suggestions
Kasias Pierogi are perfect with classic toppings like butter‚ sautéed onions‚ and sour cream․ For a modern twist‚ try adding fresh herbs‚ sauces‚ or a dollop of yogurt․ Enjoy your meal!
Classic Toppings: Butter‚ Onions‚ and Sour Cream
Kasias Pierogi are traditionally served with melted butter‚ sautéed onions‚ and a dollop of sour cream․ These classic toppings enhance the pierogi’s natural flavors‚ adding richness and a tangy note․ The butter and onions create a golden‚ savory glaze‚ while the sour cream provides a refreshing contrast․ This timeless combination brings out the authentic taste of Kasias Pierogi‚ making it a beloved choice for many․ Simple yet flavorful‚ it’s a must-try!
Modern Twists: Sauces and Garnishes
Elevate your Kasias Pierogi with modern twists like creamy pesto sauce‚ garlic alfredo‚ or a light tomato sauce for a fresh spin․ Experiment with toppings such as caramelized onions‚ crispy bacon bits‚ or roasted garlic for added depth․ Fresh herbs like parsley or dill can brighten the dish‚ while a drizzle of truffle oil adds luxury․ For a trendy touch‚ try a dollop of avocado sour cream or a sprinkle of toasted sesame seeds․ These modern accents bring a creative flair to the classic dish‚ offering endless possibilities for adventurous palates; Perfect for those seeking a contemporary twist on tradition․

Freezing and Reheating Pierogi
Kasias Pierogi can be frozen for later use․ Place them on a baking sheet to freeze‚ then transfer to airtight containers․ Reheat by boiling‚ pan-frying‚ or baking‚ ensuring they remain tender and flavorful․ Proper reheating maintains their freshness and taste‚ offering convenience without compromising quality․ Freeze for up to 3 months for optimal results‚ and enjoy anytime with minimal effort․
How to Freeze Pierogi for Later Use
To freeze Kasias Pierogi‚ place them on a baking sheet lined with parchment paper‚ ensuring they don’t touch each other to prevent sticking․
Once frozen‚ transfer them to airtight containers or freezer bags for storage․ Label and date the containers for easy tracking․
Pierogi can be frozen for up to 3 months․ This method preserves their texture and flavor‚ allowing you to enjoy them fresh-tasting whenever you’re ready to cook․
Reheating Pierogi: Tips for Maintaining Freshness
Kasias Pierogi‚ being pre-cooked‚ can be reheated effortlessly․ For best results‚ boil them briefly until warmed through or pan-fry with a little oil until golden․ Baking is another option‚ heating them in the oven at 350°F for 10-12 minutes․ Avoid overcrowding the pan or oven tray to ensure even heating․ Store leftovers in an airtight container in the fridge for up to 3 days․ Reheating preserves their flavor and texture perfectly‚ ensuring freshness in every bite․
Kasias Pierogi offer a timeless‚ delicious way to enjoy Polish tradition with modern convenience․ Perfectly crafted for effortless meals‚ they bring joy to cooking and sharing with loved ones․
Final Tips for Perfect Pierogi
For perfect pierogi‚ ensure dough is rested and rolled thin․ Fill generously but not overstuff․ Seal edges tightly to prevent filling leakage․ Cook in batches to avoid overcrowding․ Use a slotted spoon to remove and drain excess water․ For frying‚ use moderate heat and a small amount of oil to achieve a golden crust․ Experiment with toppings to enhance flavor․ Enjoy your homemade pierogi with love and care!
Enjoying the Fruit of Your Labor
Savoring the warmth of Kasias Pierogi is the ultimate reward for your efforts․ Serve them with melted butter‚ caramelized onions‚ and a dollop of sour cream for a classic experience․ Add a modern twist with fresh herbs or a light sauce․ Relish the comfort and love embedded in each bite‚ knowing your homemade pierogi bring joy and warmth to family and friends․ Enjoy the fruits of your labor with every delicious serving!