
free oval crochet doily patterns with written instructions
Discover the beauty of oval crochet doilies with free patterns featuring written instructions and photo tutorials. Perfect for all skill levels, these designs offer customization options, modern elegance, and practicality, making them ideal for enhancing home decor while providing a rewarding crochet experience.
What Are Oval Crochet Doilies?
Oval crochet doilies are delicate, lacy decorative items typically used to protect surfaces or add elegance to home decor. Made from cotton yarn and small hooks, they feature intricate patterns, often pineapple or floral designs. Unlike round doilies, their oval shape offers a unique aesthetic. They come in various sizes, from small 15-round designs to large 23-round patterns, making them versatile for different spaces. These handmade pieces combine functionality and beauty, serving as both practical protectors and stylish accents for furniture or tabletops.
Why Choose Free Patterns with Written Instructions?
Free oval crochet doily patterns with written instructions are ideal for crafters seeking convenience and clarity. They provide step-by-step guides, making complex stitches and shapes accessible. These patterns cater to all skill levels, from beginners to advanced crocheters. With detailed instructions, you can avoid common mistakes and ensure your project turns out as envisioned. Additionally, photo tutorials often accompany these patterns, offering visual guidance. This combination of written and visual instructions makes learning and creating easier, allowing you to focus on enjoying the crafting process while achieving professional results.
Benefits of Making Your Own Doilies
Creating your own doilies offers numerous benefits, including the ability to customize designs to suit your home decor. You can choose colors, yarn weights, and patterns that match your personal style. Homemade doilies are cost-effective and allow you to add unique, handmade touches to your space. They also make thoughtful gifts, showcasing your creativity and effort. Additionally, crocheting doilies can be a meditative and rewarding hobby, providing a sense of accomplishment. With free patterns, you can experiment and refine your skills while enjoying the process of crafting something beautiful and functional.
Materials and Tools Needed
Essential materials include 100% cotton yarn and a 3mm crochet hook. Choose high-quality yarn for durability and a smooth texture. Patterns specify yarn amounts and tools needed.
Yarn Selection for Doilies
For oval crochet doilies, 100% cotton yarn is highly recommended due to its durability and smooth texture. Choose yarn weights that suit your desired doily size, from fine threads for delicate designs to medium weights for sturdier pieces. Opt for colors that complement your home decor, such as soft pastels or classic whites. Ensure the yarn has good stitch definition to highlight intricate patterns. Always check the pattern’s recommendations for specific yarn amounts and qualities to achieve the best results. The right yarn choice ensures a professional finish for your doily.
Crochet Hook Sizes and Types
Selecting the right crochet hook is crucial for achieving the desired texture and size of your oval doily. A 3mm crochet hook is commonly recommended for most doily patterns, especially when using 100% cotton yarn. Steel or aluminum hooks are ideal for precision and smooth stitching. Ensure the hook size matches the yarn weight specified in your pattern to maintain even tension and prevent the fabric from becoming too loose or stiff. Proper hook care, such as storing them in a protective case, will extend their lifespan and performance.
Other Essential Tools for Crochet
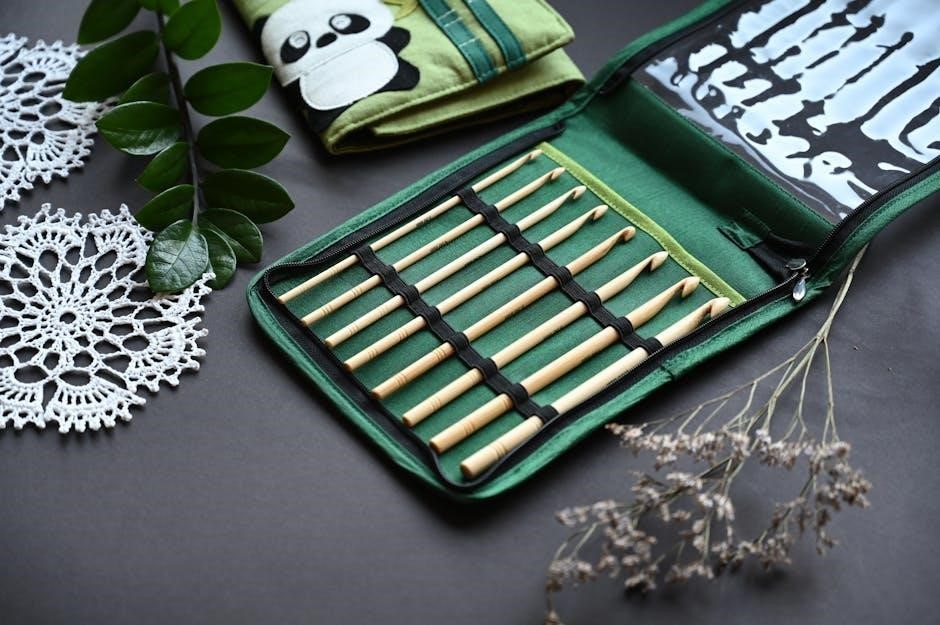
Besides the hook and yarn, essential tools for crocheting oval doilies include a tapestry needle for weaving in ends, scissors for cutting yarn, and stitch markers to mark increases or decreases. A measuring tape or ruler ensures accurate sizing, while a yarn needle aids in sewing seams if necessary. Optional tools like stitch counters or crochet-specific apps help track progress and maintain consistency. Proper tool organization, such as using a crochet kit or pouch, keeps everything accessible and streamline your crafting process for a seamless experience.

Step-by-Step Guide to Crocheting an Oval Doily
Start with a center motif, then work the pineapple pattern, increasing rounds to achieve the oval shape. Use 100% cotton yarn and a 3mm hook for best results.
Understanding the Basics of Crochet Stitches
Mastering basic crochet stitches is essential for creating oval doilies. Start with the chain stitch, single crochet, and double crochet. Practice reading patterns and abbreviations to ensure accuracy. Focus on maintaining consistent tension to achieve even stitches. Begin with a center motif, then progress to more complex patterns like the pineapple stitch. Use 100% cotton yarn and a 3mm hook for a delicate, lacy finish. These foundational skills will help you confidently work through the detailed instructions provided in free oval doily patterns.
Starting the Center Motif
Begin your oval doily by creating the center motif, a foundational element that sets the tone for the entire project. Use a 3mm crochet hook and 100% cotton yarn for a delicate texture. Start with a slip knot and chain the required number of stitches to form a small loop. Work the first round of single crochet or double crochet stitches around the loop to establish the base. Skip 9 loops of the center motif, attach the thread in the next loop, and work the pineapple pattern without cutting the thread, ensuring a seamless transition. This step requires precision to maintain even tension and create a smooth foundation for the doily.
Working the Pineapple Pattern
The pineapple pattern adds a classic, lacy touch to your oval doily. Starting from the center motif, attach your thread in the next loop after skipping 9 loops. Work the pineapple stitches as instructed, ensuring not to cut the thread. This pattern involves creating V-shaped stitches that fan out, forming the iconic pineapple design. Maintain even tension to ensure the fabric lies flat. As you progress, the pineapple pattern will naturally expand, shaping the doily into its oval form while adding intricate detail and visual interest.
Increasing and Shaping the Oval Form
As you progress in your doily, shaping the oval form requires strategic increases. By adding stitches at specific intervals, the design naturally expands into an oval. Start by working increases in each round, ensuring even spacing to maintain symmetry. Use the pineapple pattern as a guide, attaching thread in the next loop after skipping 9 loops. This technique allows the doily to grow while retaining its delicate, lacy appearance. Keep tension consistent to avoid puckering, and watch as your doily transforms into a graceful oval shape with each completed round.
Finishing Touches and Blocking
The final steps involve weaving in ends and blocking your doily for a polished look. Wet or steam blocking enhances the lacy texture and evens out stitches. Lay the doily flat, pinning it to maintain the oval shape. Allow it to dry completely before removing the pins. This process ensures the doily lies flat and showcases its intricate details. For a crisp finish, lightly steam block without scorching the yarn. Proper blocking highlights the pattern’s elegance and gives your handmade doily a professional appearance that lasts.
Customization Ideas for Your Doily
Personalize your doily by choosing vibrant colors, experimenting with yarn weights, or adding delicate embellishments. Adjust sizes or patterns to suit your decor, creating a unique, modern piece.
Choosing Colors and Yarn Weights
Selecting the right colors and yarn weights can elevate your doily’s beauty. Opt for vibrant hues to add a modern touch or pastels for a vintage feel. Lighter yarn weights create delicate, lacy textures, while heavier yarns offer durability. Cotton yarn is ideal for its softness and stitch definition. Experiment with variegated yarns for unique color transitions. Consider the intended use and setting when choosing your palette. Testing a swatch helps ensure the yarn weight and color will achieve the desired effect for your oval doily project.
Adding Embellishments and Edgings
Elevate your oval doily with creative embellishments and edgings. Add intricate lace borders or delicate beads for a touch of elegance. Crochet flowers, shells, or scallops can enhance the edges, while subtle embroidery or appliques bring personal flair. Experiment with picot stitches or crab stitch for a decorative finish. Photo tutorials offer guidance for complex edgings. Tailor these details to match your home decor or gift recipient preferences, ensuring your doily stands out as a unique, handmade treasure.
Adjusting Sizes for Different Projects

Customize your oval doily by adjusting its size to suit various purposes. Patterns often include instructions for different rounds, such as 15 or 23, allowing you to create smaller coasters or larger table centerpieces. Use lighter yarn and smaller hooks for delicate pieces or thicker yarn and larger hooks for statement items. This flexibility ensures your doily fits its intended use, whether for decorative accents or functional purposes. Patterns with written instructions make it easy to adapt sizes while maintaining the desired shape and texture.
Tips for Success

Achieve consistent stitches by managing yarn tension and understanding abbreviations. Regularly count stitches to avoid mistakes. Use photo tutorials for clarity and troubleshoot common issues promptly for flawless results.
Reading Patterns and Understanding Abbreviations
Mastering crochet abbreviations is crucial for success. Familiarize yourself with common symbols and terms like ch, sc, and st. Start by reading the pattern thoroughly, ensuring you understand each step. Pay attention to stitch counts and row endings to maintain consistency. For complex designs, break the pattern into smaller sections. Use online resources or tutorials to clarify unclear instructions. Counting stitches regularly helps prevent mistakes. Keep a cheat sheet handy for quick reference. With practice, decoding patterns becomes second nature, allowing you to focus on creating beautiful doilies effortlessly.
Managing Yarn Tension for Even Stitches
Maintaining consistent yarn tension is key to achieving even stitches in your oval doily. Start by using the recommended yarn and hook size for your pattern. Crochet loosely but not too tightly, as this can cause puckering. Use stitch markers to keep track of your place and ensure even spacing. Regularly count your stitches to avoid mismatches. Relax your hands while crocheting to prevent uneven tension. If needed, adjust your grip or take breaks to maintain consistency. Proper tension ensures a smooth, professional finish for your doily.
Troubleshooting Common Mistakes
Common mistakes in crochet doilies include uneven stitches, miscounted rounds, or incorrect tension. Identify errors early by regularly counting stitches and checking your work. If stitches are too tight, try a larger hook; if too loose, switch to a smaller one. For misshapen ovals, ensure consistent increases and decreases. Pay attention to pattern instructions, especially for pineapple motifs. Use stitch markers to track your place and maintain even spacing. Frogging (ripping out) stitches is sometimes necessary to correct mistakes. Practice patience and adjust as needed to achieve a flawless finish.
Popular Free Oval Doily Patterns
Explore popular free oval doily patterns, from small 15-round designs to large 23-round creations, perfect for all skill levels with photo tutorials and customization options.
Small Oval Doily Pattern (15 Rounds)
The small oval doily pattern, completed in 15 rounds, is perfect for beginners or small projects. Using 100% cotton yarn and a 3mm crochet hook, it creates a delicate, lacy design. This pattern is ideal for those looking to craft a charming, functional piece with a vintage touch. It includes written instructions and photo tutorials, ensuring clarity and ease of completion. The compact size makes it great for decorative accents or gift items, while the simplicity allows for customization to suit any home decor style.
Large Oval Doily Pattern (23 Rounds)
The large oval doily pattern, spanning 23 rounds, is a stunning project for more experienced crocheters. It also uses 100% cotton yarn and a 3mm hook, creating a grand, elegant design. This pattern is ideal for covering larger surfaces or making a bold decorative statement. Detailed written instructions and photo tutorials guide you through each step, ensuring a flawless finish. The intricate details and size make it a showpiece, perfect for special occasions or as a centerpiece in any room, offering both functionality and aesthetic appeal.
Modern and Elegant Designs
Modern and elegant oval doily patterns blend timeless charm with contemporary style. These designs emphasize clean lines, minimalist motifs, and versatile color schemes, appealing to today’s crafters. They incorporate current yarn trends and fashion influences, allowing for personalization. Perfect for those seeking sophistication, these patterns enhance home decor while remaining practical. With detailed instructions, they cater to all skill levels, ensuring a polished and stylish result that elevates any space with subtle, modern beauty.
Patterns for Every Skill Level
From beginner-friendly designs to intricate advanced patterns, free oval crochet doily patterns cater to all skill levels, ensuring everyone can create beautiful, elegant pieces with ease.
Beginner-Friendly Doily Patterns
Perfect for new crocheters, these patterns offer clear, step-by-step instructions and photo tutorials. The small oval doily, made in 15 rounds, and the large, in 23 rounds, are ideal projects. Using 100% cotton yarn and a 3mm hook ensures a smooth experience. These designs are great for home decor or as gifts, with options to customize colors and sizes. Beginner-friendly patterns are designed to build confidence and skills, making them a great starting point for anyone new to crochet.
Intermediate and Advanced Designs
For crocheters seeking a challenge, intermediate and advanced oval doily patterns offer intricate stitches and detailed instructions. These designs often feature complex motifs like pineapple patterns, requiring precision and skill. With options to customize sizes, yarn weights, and colors, they allow for personal creativity. Tips for managing yarn tension and troubleshooting common mistakes are included, ensuring successful outcomes. These patterns are perfect for those looking to enhance their skills and create stunning, elegant pieces that showcase their craftsmanship and attention to detail.
Patterns with Photo Tutorials
Enhance your crochet journey with free oval doily patterns accompanied by detailed photo tutorials. These visual guides provide step-by-step clarity, making complex stitches and motifs easier to follow. Perfect for visual learners, they ensure accuracy and confidence. Many tutorials include customization tips, allowing you to adapt designs to suit your style. Whether you’re crafting small or large doilies, photo tutorials offer inspiration and motivation, helping you create beautiful, professional-looking pieces with ease and precision.
Downloading and Printing Patterns
Access free oval crochet doily patterns online, download them as PDFs, and print for easy reference. Organize instructions and diagrams for a seamless crocheting experience.
How to Access Free Patterns Online
Find free oval crochet doily patterns on platforms like Pinterest and crochet blogs. Many patterns include written instructions and photo tutorials for clarity. Search terms like “free oval crochet doily patterns” yield numerous results. Websites often offer PDF downloads, making it easy to print and organize. Some patterns feature customization options, allowing you to adjust sizes or yarn weights. With just a few clicks, you can access designs suitable for all skill levels, from beginner-friendly to intricate designs. Start your project today with these readily available resources!
Printing and Organizing Instructions
For a seamless crochet experience, print your chosen patterns on high-quality paper. Organize instructions in a binder or folder, keeping them tidy. Many patterns are available as downloadable PDFs, making it easy to print and store. Consider adding tabs or page markers for quick reference. If a pattern includes diagrams or charts, print them on separate sheets for clarity. Storing your patterns this way ensures they remain accessible and undamaged, allowing you to focus on your crafting without interruptions. This organized approach enhances your overall crocheting enjoyment and efficiency.
Using Diagrams and Charts
Diagrams and charts are invaluable tools for understanding complex stitches and patterns in oval crochet doilies. Many free patterns include visual guides to help crocheters follow along, especially for intricate designs like the pineapple motif. These diagrams often use symbols and abbreviations, so it’s essential to refer to the provided legend or key. By aligning the diagrams with written instructions, you can better grasp the pattern’s flow. For visual learners, charts are particularly helpful in mastering shapes and ensuring symmetry in your doily’s design.
Community and Support
Join crochet communities to connect with fellow crafters, share your projects, and find endless inspiration. Engage, learn, and stay motivated with support from passionate makers online.
Joining Crochet Communities
Joining crochet communities offers invaluable support and inspiration for crafting oval doilies. These groups, found on platforms like Facebook, Instagram, and Pinterest, connect you with fellow crocheters. Share your projects, ask questions, and learn from experienced makers. Many communities provide feedback, tips, and motivation, helping you refine your skills. Whether you’re a beginner or an advanced crafter, these networks foster creativity and keep you updated on the latest trends and patterns. Engaging with others can enhance your crochet journey and make it more enjoyable and rewarding.
Asking Questions and Sharing Projects
Engaging with crochet communities allows you to ask questions and share your doily projects for feedback. Platforms like Pinterest and Facebook host active groups where crocheters exchange ideas and inspire one another. Sharing your work-in-progress or finished doilies can spark conversations and provide valuable insights. Many crocheters find motivation in showcasing their creations and receiving encouragement from like-minded crafters. Whether troubleshooting a stitch or celebrating a finished piece, sharing your journey enriches your crochet experience and fosters connections within the crafting community.
Finding Inspiration and Motivation
Finding inspiration for your oval doily project is effortless with the abundance of free patterns and photo tutorials online. Pinterest and crochet communities are treasure troves of creative ideas, showcasing stunning designs that cater to all tastes. Seeing finished projects can motivate you to start your own, while written instructions ensure clarity. Modern patterns, with their customization options, inspire experimentation, allowing you to adapt designs to suit your style. The joy of creating something beautiful and functional keeps crocheters engaged and eager to explore new possibilities, making every stitch a rewarding experience.
Creating an oval doily is a fulfilling craft that brings joy and pride. Transforming yarn into a beautiful, functional piece is truly rewarding. Start your project today!
Final Thoughts on Making Oval Doilies
Crafting an oval doily is a rewarding experience, offering a perfect blend of creativity and relaxation. With free patterns and written instructions, anyone can create these delicate, functional pieces. Whether you’re a beginner or an advanced crocheter, the process is both therapeutic and fulfilling. The ability to customize colors, sizes, and designs makes each doily unique. As you complete your project, you’ll feel a sense of accomplishment and pride in transforming yarn into a beautiful, lasting piece of art for your home or as a thoughtful gift.
Encouragement to Start Your Project
Starting your oval doily project is an exciting journey! With free patterns and clear instructions, you can easily begin, even as a beginner. Choose a design that sparks your creativity and customize it to suit your style. Remember, every stitch is a step toward something beautiful. Don’t hesitate to join crochet communities for support and inspiration. Embrace the process, enjoy the therapeutic rhythm of crocheting, and take pride in creating something truly unique. Happy crocheting—your handmade doily awaits!